
Contributor: Brittany Hopkins
From aimlessly cruising the Valley on a bike to clawing your way up the face of a mountain, Yosemite National Park has something for everyone. If you’re looking for a real butt-kicking experience you can complete in one day, hiking the 9,926 foot mountain Clouds Rest from the Yosemite Valley floor may be the adventure for you. Here’s what you need to know to successfully reach the top and back in one piece before dark.
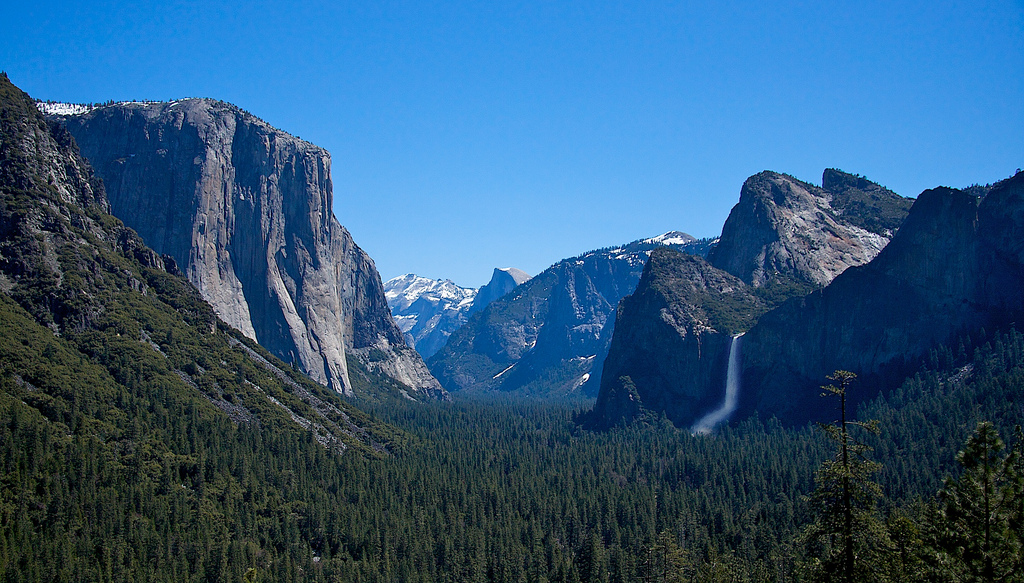
A view of Yosemite National Park, with Clouds Rest off in the distance behind Half Dome. Photo by Stuart Richards
Why Bother: On a clear day, the top of Clouds Rest rewards you with a 360-degree panoramic view of Yosemite. You’ll be looking down on Half Dome, and enjoy excellent views of North Dome, Tenaya Lake and a host of other mountains. During the high season you’ll share the trail with hordes of Half Dome hikers (and actually see them ascending the cables carved into the mountain like a line of tiny ants), but once the Clouds Rest Trail splits off, the crowd will likely dissipate. Successful completion of this hike also comes with bragging rights. Despite hobbling home on stiff limbs, every one of us felt like an Olympian.
Where to Start: OK, you’re convinced. Now what? Depending on the season, there are two different trailheads you can start from.
Happy Isles Trailhead in the Yosemite Valley -- This is where we started. We parked in a nearby lot and hiked half a mile to the trailhead. From here, the round-trip is roughly 22 miles. While much longer and much more strenuous than the second option below, I hear it’s also much more scenic. Happy Isles Trail is also open year-round, weather dependent.
Clouds Rest Trail off of Tioga Road: YosemiteHikes.com offers a solid overview of starting here and says this round-trip option is roughly 14.5 miles. You’ll just need to be sure the road is open during your trip.
Difficulty: With a 6,000 foot elevation gain from the Valley floor and multiple sections of steep switchbacks, not even the fittest adventurer in my group would call this 22-mile hike easy. It's definitely possible to make this trip in one day, but to be back before dark, you'll want to leave the trailhead by 7 or 8 a.m. If physical fitness, pre-existing injuries or altitude sickness are concerns, you may want to consider starting from Tioga Road. You can always hike from Happy Isles Trailhead to the Mist Trail and back another day!
My Experience: The first mile on the Happy Isles Trail was shockingly tiring. While it’s wide and paved, it’s also quite steep and the altitude had me winded much quicker than expected.
Happy Isle Trail leads to the iconic Mist Trail -- our primary reason for choosing this 22-mile route. You’ll climb a sturdy rock staircase alongside the gorgeous Vernal Falls. Depending on the time of year, the waterfall will either drench or lightly mist you and the steps, but the staircase offers a steel railing you can clutch and is wide enough for quicker hikers to comfortably pass.

Gorgeous views of Vernal Falls do a wonderful job of distracting you from the steep incline ahead. For awhile at least.
For me, the toughest portion of the hike came next. Steep rocky switchbacks leading to the top of Nevada Falls. I actually didn’t think much of it on the way up -- and enjoyed views of the waterfall on the way, but on the way down -- with about 20 miles behind me and aching knees -- scrambling down this steep section was a test in mental and physical endurance. If steep, rocky descents aren’t your thing either, there is a way around it. Consider looking into taking the John Muir Trail to the Happy Isle Trail on the way home instead. This detour will add about a mile and a half to the end of your trek. I hear this section of the John Muir trail is a bit torn up and covered with manure from the mules that regularly make the trek, but I have a feeling I may have preferred it. You can find a bit more information on this alternative route at the bottom of this EveryTrail page.

Climbing one steep section of the Mist Trail to get to an even steeper and rockier section.
Once you’ve completed this steep intro, you’ll hike a couple of miles through the relatively flat Little Yosemite Valley -- an area with one of the highest concentrations of bears in the Valley. While a ranger warned us about a bear and two cubs perusing the Half Dome Trail ahead of us, we didn’t have the pleasure of catching up with them.
Now, with the pleasant flats behind you, the going gets tough again relatively quickly. You’ll cut up toward the south ridge of Yosemite Valley, gaining about 1,000 feet in elevation until you hit a trail junction. Here you’ll take the Clouds Rest Trail, which greets you with steep uphill climbs followed by a long stretch of switchbacks unprotected from the sun’s rays. But glimpses of Clouds Rest’s and Half Dome’s peaks through the trees kept us going strong.
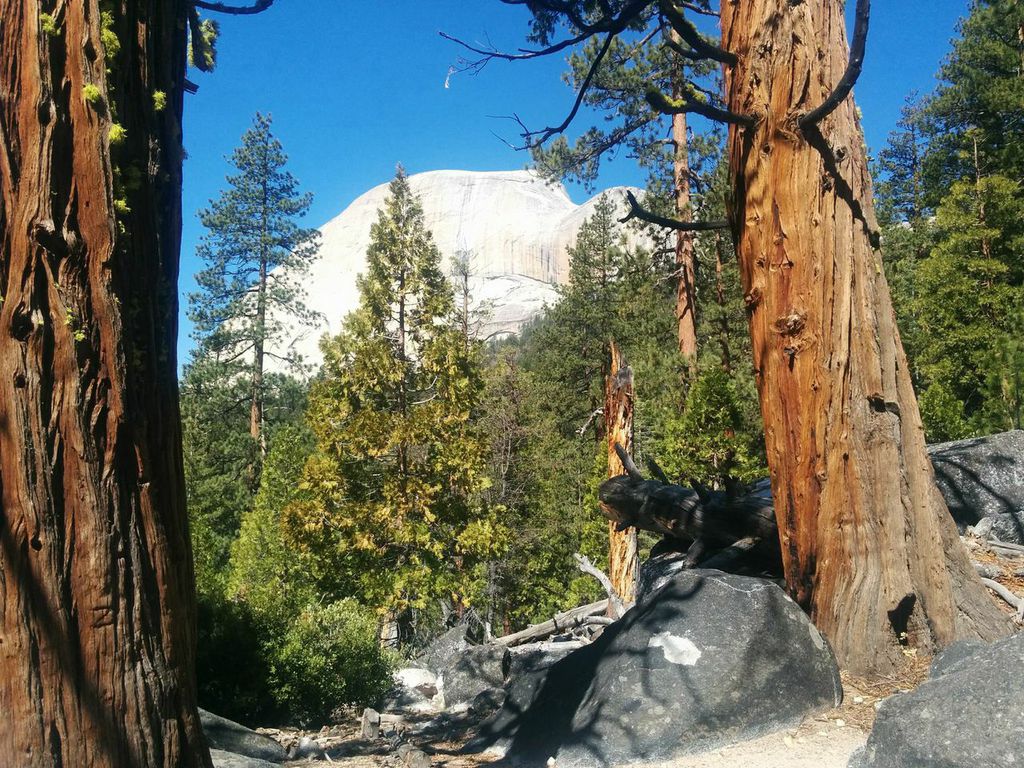
Glimpses of Half Dome through the trees along the Clouds Rest Trail kept our minds busy brainstorming future trips, recounting past trips and imagining what we'd find on the peak.
The last .6 miles to the peak is a true test. It felt like we were scrambling up rocky switchbacks for hours.

Just below the peak. Almost there.
But the payoff is well worth it.
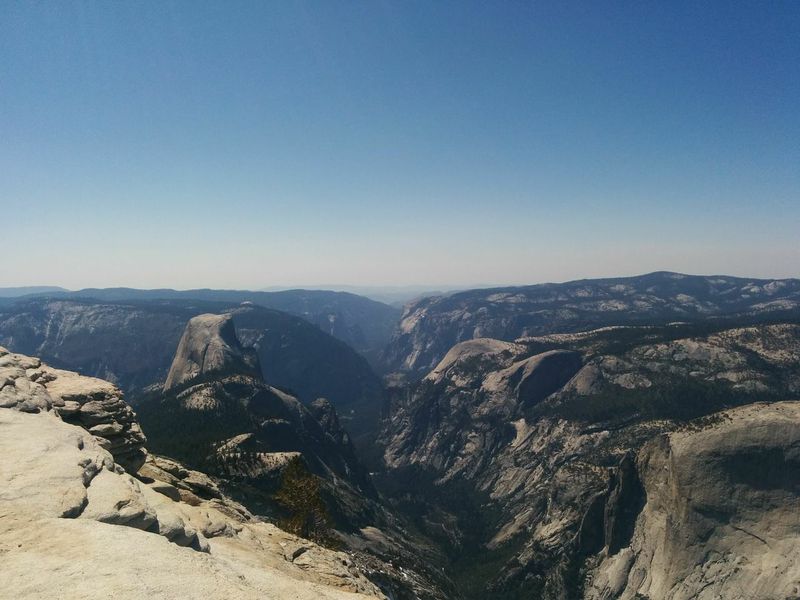
From the top of Clouds Rest, looking down on Half Dome and the Yosemite Valley.
The peak offers plenty of space to take snap 360-degree panoramas, rest your weary bones on the rocks and engulf a sack lunch before dragging yourself back the way you came.
Restrooms: Sure, they were just sheltered holes in the ground, but I was delighted to find a number of pretty well-kept facilities along the way. You’ll find at least three spread throughout the route.
What to Pack: Some of the basics you’ll need include:
Trail map
Layers and a hat
Water
Snacks & lunch
Hiking poles
Sunscreen
Headlamp & first-aid kit -- just in case!
Lodging: There are plenty of options in the area. If camping in Yosemite Valley is of interest, you’ll need to plan your trip the fall before. Details on campsite reservations can be found here. We found a lovely cabin just outside the park limits just a month or two before our trip using VRBO. Nothing beats a hot shower and warm bed after such a grueling trek.
Overall: Hiking Clouds Rest from the Yosemite Valley is not an easy task, but your efforts will pay-off in the form of extraordinary views and a feeling of serious accomplishment. And if you're looking to build confidence for future multi-day backpacking trips, this could definitely help!